
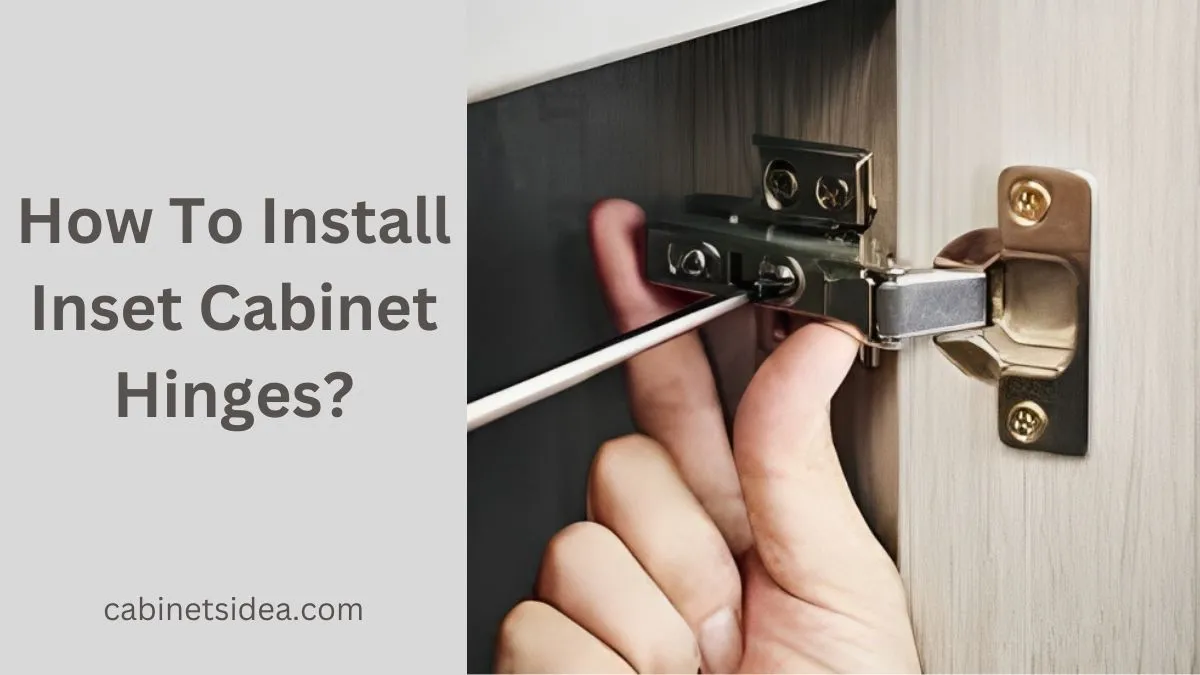
The choice of hinges can significantly impact both functionality and aesthetics. Inset hinges or European hinges become a great choice because they allow the door to sit flush with the frame when closed.
In this way, the door blends with the cabinet and offers a sleek and flush appearance to the kitchen. If you are also installing inset cabinet hinges this step-by-step guide on how to install inset cabinet hinges will help you to install them perfectly.
Types of Concealed Hinges
All the concealed hinge types are a little bit different from each other and their installation is also different. They are also known as soft close European hinges. The main three types of concealed hinges are explained below:
Inset Hinges
Inset hinges set the door completely inside the cabinet frame. They are designed to fit entirely inside the cabinet and can’t be looked at when the door is closed.
Half-overlay Hinges
Half-overlay hinges are great for a face frame cabinet. By installing a half-overlay hinge, the cabinet door covers half of the cabinet frame and two doors share a side panel.
Full-overlay Hinges
By installing a full-overly hinge, the cabinet door covers whole the cabinet panel. The whole frame of the cabinet will be covered by the doors.
Step By Step Guide
This step-by-step guide will help you with Blum or any other inset hinge installation without professional help. But, read and follow each step with extreme care especially measuring and marking because if you do not measure accurately you can’t install precisely.
Tools You’ll Need
There are some tools listed below that you will need for installation:
- Screwdriver
- Measuring tape
- Inset hinge template
- Drill
- Rafter square
- Forstner bit
Measure and Mark
Most of the hinges come with an installation template, if you also have one then trace it on the cabinet. Unfortunately, if you do not have one, you can do it with the help of a hinge jig if you know how to use Cabinet Hinge Jig.
However, if you can’t do both, I will do it for you. First mark where you have to install inset hinges on the cabinet. Now you have to drill a correctly sized cup hole in door with a Forster bit.
Now, I will tell you how to measure it. If you have to install a 35mm inset hinge, mark a point 21.5mm inside the frameless cabinet door edge. For 40mm, 24mm, and for 26mm it will be 17mm inside the cabinet door edge. This point will be the center of the cup hole.
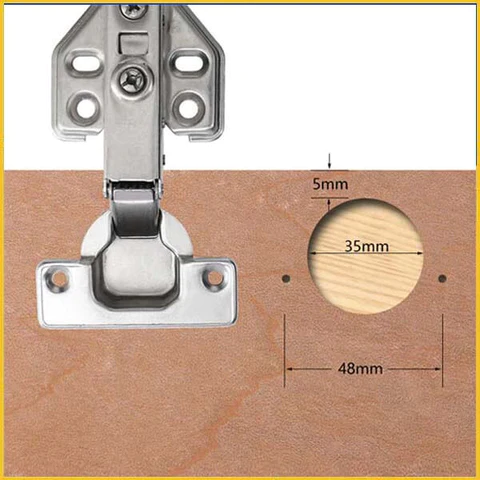
Now mark the placement of the plate of the hinge for a frameless cabinet. For a 35mm inset hinge, the mounting screws of the plate will be marked 27 mm+ door thickness inside the cabinet side panel.
Pre-drill Holes
Now it’s time to drill the holes on both the cabinet door and side panel. Take a Forstner bit of your inset hinge’s size and drill a cup hole on the cabinet door where you have marked it.
Place the center spur of the bit on the mark and drill a 12mm deep cup hole. This cup hole will be 4mm inside the edge of the cabinet door.
Pre-drill screw holes in the cabinet side panel where you have marked the plate of the hinge. Inset doors set inside the cabinet that’s why must install door stoppers.
Related Post: How to Use Kreg Cabinet Hinge Jig? 5 Simple Steps
Attach Hinges to the Door
Now we are going to install a Blum inset hinge to the door. Place the European inset hinge on the door and set the cup into the cup hole. Do it for each cabinet hinge.
Make sure the cup sets completely in the hole, If it’s not deep the cup hole further. Now align the inset hinge by using a Rafter square. After aligning, screw it on the cabinet door.
Attach Hinges to Cabinet Frame
Now mount the inset hinge plate on the cabinet frame. Make sure both screws are aligned precisely. Once the inset hinge plate is mounted it’s time to install the door.
Push the back edges of the hinge first and then press it to clip them together. Finally, the installation has been completed, and it’s time to check whether it’s working perfectly or not.
Adjust Inset Hinge
After installation, every cabinet needs some adjustments for its proper functionality. Your cabinets may also need some adjustment. Must know how to adjust cabinet hinges easily before doing.
Up and down adjustment: On the European inset hinge, there will be two oval screw holes. These screws are to adjust hinges up and down. Loose the screws slightly and adjust the height of the door. After that tight the screws again.
Side-to-side adjustment: The two horizontal screws on the inset hinge are to adjust the cabinet door from side to side. Turn the top hinge’s side-to-side adjustment screw to bring the cabinet door closer to the cabinet box if it appears to be tilting downward to the right.
In and out adjustment: The top hinge should be adjusted inward to meet the cabinet box if there is a space between it and the top of the door.
Related Post: How To Adjust Cabinet Hinges? 3 Simple Ways
Final Thought
Installing inset cabinet hinges is different because the inset doors are set inside the cabinet frame that’s why it needs more precision than other full-overly or half overlay cabinet hinges because their doors are set on the cabinet frame not inside.
If you have the incorrect measurements, you can’t get the perfect installation. Take your time while doing the whole work and do it with extreme care. GOOD LUCK!
FAQs
How does an inset hinge work?
The Inset hinge consists of two parts: one on the cabinet frame and the other on the door itself. Once the door is closed, both parts of the hinge are aligned, allowing the door to sit flush with the cabinet frame.
Can you put hidden hinges on inset cabinet doors?
Yes, you can use hidden hinges on inset cabinet doors. Hidden hinges are designed to be installed inside the cabinets which makes them invisible when the door is closed, giving a clean and modern look to the cabinets.
Can you use overlay hinges for inset doors?
If you install overly hinges for inset doors the door will not flush with the cabinet frame when closed. Overly hinges allow the door to sit on the top of the cabinet frame not to flush when closed.